Elevate Your DIY Skills with the Best Rewax Techniques in 2026
The world of DIY is ever-evolving, and as we step into 2026, the art of rewaxing has gained prominence among enthusiasts and professionals alike. Rewaxing is an essential skill that can dramatically enhance the longevity and performance of your wooden and fabric items. Whether you are working on furniture, outdoor gear or even art pieces, mastering the best rewax techniques can elevate your projects to a whole new level.
The Importance of Rewaxing
Rewaxing is not merely about aesthetics; it serves functional purposes as well. Wax provides a protective layer that guards against moisture, dirt and wear. In 2026, many DIY enthusiasts understand that maintaining the integrity of their materials requires regular rewaxing. This practice not only prolongs the life of items but also enhances their natural beauty, allowing the grain of the wood or the texture of the fabric to shine through.
Choosing the Right Wax
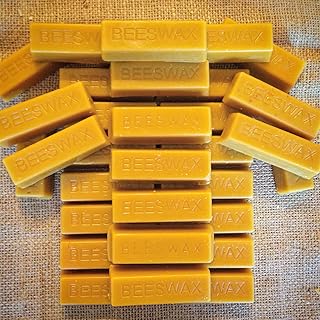
One of the first steps in the rewaxing process is selecting the right type of wax. In 2026, there are various options available to cater to different needs. Natural beeswax is a popular choice due to its durability and eco-friendliness. It offers excellent water resistance and is ideal for wooden furniture. For those working with fabrics, a blend of paraffin and microcrystalline wax provides a robust finish without compromising the material's flexibility.
People Also Look For:
- PIPIHUA Beeswax Polish for Wood & Furniture - Natural Wood Wax for All Types, Furniture Polish to Enhance & Protect Any Wooden Sur...
- Pure British Beeswax Blocks 100% Natural Organic Bees Wax 100-125 grams – Triple Filtered for Making Your own Candles, Leat...
- CARGEN Beeswax Furniture Polish - Wood Seasoning Beeswax for Furniture Wood Polish and Conditioner Wood Wax for Dining Table Floor...
- Natural Reusable Beeswax Food Wraps - Set of 5 Sheets 3 Large (30x30cm),1 Medium(20x20),1 Small(15x15) Sizes Wraps - Patterns Rand...
- Furniture Clinic Clear Beeswax Polish for Wood & Furniture - 200ml - Natural Beeswax for All Wood Types and Colours - Wood Furnitu...
Preparing Your Surface
Before applying any wax, preparation is key. Start by thoroughly cleaning the surface to remove dust and grime. For wooden items, sand the surface lightly to create a smooth base for the wax application. This step is crucial in achieving an even finish. In 2026, many DIY enthusiasts are also opting for eco-friendly cleaning solutions to ensure their projects align with sustainable practices.
Application Techniques
Once your surface is prepared, it’s time to apply the wax. There are several techniques to consider, and the choice often depends on the type of item you are working on. For wooden surfaces, using a soft cloth or a brush can help in applying an even coat. The circular motion is recommended for ensuring that the wax penetrates the wood effectively. For fabrics, using a sponge or a cloth can yield good results. It is essential to work the wax into the fibres to provide adequate protection.
Layering for Durability
In 2026, a common practice among seasoned DIYers is to apply multiple layers of wax. This not only enhances the protective qualities but also deepens the finish. Allow each layer to dry completely before applying the next. The drying time can vary based on the type of wax used and environmental conditions, so patience is vital. As a rule of thumb, a minimum of two to three layers is advisable for optimal results.
Buffing for a Professional Finish
After the final layer of wax has been applied and dried, buffing is the next critical step. In 2026, many DIY enthusiasts utilise electric buffers for larger surfaces, while a soft cloth works well for smaller items. Buffing not only helps to create a lustrous finish but also enhances the durability of the wax layer. The goal is to achieve a silky smooth texture that feels pleasant to the touch.
Maintenance and Touch-ups
Even the best rewaxed items require maintenance. Regular inspections can help you identify areas that might need touch-ups. In 2026, many recommend a light buffing and the application of a thin layer of wax every six months to keep your items in top condition. This proactive approach can save time and effort in the long run, ensuring that your projects continue to impress.